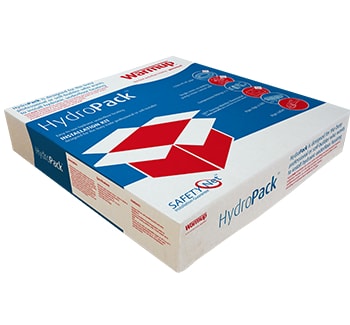
Hydropack System
Installation kit that comes with everything you need for quick and easy installation of a project up to 22m²
Key Benefits

Compact, lightweight and modular
Compact and lightweight modular installation kit, designed to be connected onto existing pipework
All in one kit - ideal for smaller projects
Everything you need for small projects of 22m² or less in one handy kit for quick and easy installation
Compatible and reliable components
All components are compatible and from a single source for reliability
For an Easy Installation
HydroPack is a kit for fast and easy wet underfloor heating installation and it comes with everything you need to install the system in hours. It is an ideal solution for small projects of 22m² or less (additional products are available for larger rooms), providing a maximum heat output of up to 3kW.
The kit includes the Warmup 3iE hydronic thermostat, the PE-RT pipe plus all the components necessary to complete a successful underfloor heating installation.
All-in-one Floor Heating Kit
All the components are compatible and from a single source, packaged in one convenient kit for fast and easy installation with no need to source the components separately. As with all hydronic systems, check that the heat source is compatible with an underfloor heating system and has the sufficient capacity to supply sufficient energy for the Hydropack and other system requirements.
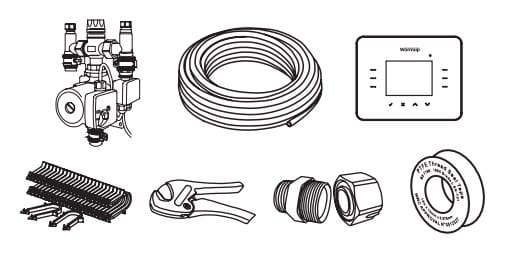
Pack Components
Warmup hydropack system kit comes with the following components:
- 1 x 120m Coil of PE-RT Pipe
- 1 x Single Room Pump/Mixing Control Unit
- 2 x Compression Fittings
- 1 x Warmup 3iE™ Room Thermostat
- 600 x Pipe Clips
- 1 x Pair of Pipe Cutters
- 1 x PTFE Thread Seal Tape
- 1 x Installation Instructions
Guarantee and Warranty

Safety Net Installation GuaranteeIf you accidentally damage the underfloor heating pipe during installation, return it to Warmup and we will replace it with the same size and make pipe free.

50 Year Pipe WarrantyThis product comes with a comprehensive warranty of fifty years on the pipe. We are completely confident in the standard of our products.
Technical Specification
Pump Mixing Unit
|
Compact bolt-on unit provides quick and easy installation |
|
Easy to set-up with an adjustable temperature range of 35 oC to 65 oC |
|
Delivers controlled mixed temperature water to the underfloor heating system with heat output of up to 3kW |
|
Controls flow temperature to +/-2 oC with changing boiler flow and return temperature |
|
Maximum Static Pressure: 10 bar |
|
Maximum temperature: 90 °C |
|
Adjustable control range: 35-65 °C |
|
Factory pre-set: 35 °C (Minimum setting) |
|
Maximum Static Pressure: 10 bar |
|
Fail safe feature |
Installation Guide
Before commencing installation, ensure the insulation is laid on a clean and level subfloor. A perimeter strip or edge insulation will need to be laid around the perimeter of the room. The insulation should conform to building regulations or practices and laid as per manufacturers instructions.
The compact control and pump unit should be wall mounted in a vertical position on a suitable wall. Choose a suitable & solid mounting location, ensuring adequate clearance for primary and underfloor heating pipework and accessibility of the control unit.
Begin to unwrap and uncoil the pipe from the inside centre of the coil, cut the end off with the cutters to leave a neat square cut, but leaving a rounded pipe (i.e. not compressed). Once the pipe has gone through the compression fitting, insert the pipe into the flow from the mixer pump assembly for the underfloor heating. Refer to installation instructions .
Once connected, begin laying the pipework around the room using the preferred pipe pattern (see examples below). Take care to turn the coil of pipe as you uncoil it to relieve tension and staple the pipe using the pipe clips provided into the insulation. An allowance of 5 clips per linear metre of pipe has been included. However less clips may be required on the straight runs and more required on the loops.
Spiral pipe layout – for rectangular shaped rooms where even spread of heat is required
Serpentine pipe layout – for odd shaped or specific-heat areas, i.e. to concentrate flow near windows or doors
Once the pipework has been laid, work out where to cut the pipe for the final connections to the pump/mixer kit. Insert into the final compression fitting and connect to the pump/mixer valve. Tighten the compression fittings.
First the pipework will need to be filled and flushed with fresh cold water from the mains supply. Connect your hose to the flow side of the mixing valve that will be connected to the main flow from the heating system. Connect a hose to the return side of the mixing valve, that will flow back to the heat source for reheating. Place the mains water supply and flush through with the mains water until no air bubbles can be seen in the discharge of water.
Using a pressure testing kit (available for hire from your local plant/test hire or purchase from your local plumbers merchant), connect to the red valve and open. Build the pressure up to 6 Bar and hold for 1 hour. Once the test is complete then the system needs to be left under pressure during the screeding process. At least 2 Bar pressure is recommended for the process. This way if the pipework is damaged a leak and drop in pressure will be shown, then remedial repair work can take place as required.
Once the system has been installed and pressure tested it should be protected by laying the floor screed as soon as possible.
Completing the job
If using a standard sand/cement screed, a thickness of between 65mm & 75mm on top of the insulation is recommended. The screed & screeding works must comply with current Building Regulations and attention must be paid to the curing times. Under no circumstances should the underfloor heating system be used to force curing of the screed. The mixing valve on the control pack should be set to the minimum temperature when commissioning commences after the screed has cured as per manufacturers instructions. Run with the heat on continuously for 3 days, after this a steady increase of 2-3°C per day can be adopted upto the desired working temperature. Then run for a further 4 days at this temperature. Ensure relative humidity of the screed is correct before laying floor finishes.
Flow and Return Temperature
| Floor finish | Resistance (m²K)/W | Output (W/m²) for 40°C- 30°C | Output (W/m²) for 45°C- 35°C | Output (W/m²) for 50°C- 40°C | Output (W/m²) for 55°C- 45°C |
| Carpet | 1,5000 | 34 | 47 | 58 | 70 |
| Timber | 1,0000 | 40 | 53 | 69 | 83 |
| Vinyl | 0,5000 | 48 | 66 | 83 | 95 |
| Tile | 0,1000 | 60 | 80 | 95 | 120 |
Installing this product? You will also need:

Clypso Insulation
Warmup Clypso Insulation is high quality thermal insulation with a conductivity of 0.022 W/mk

Ready for a quote?
Find out exactly how much a water or electric system will cost for your home and order it online with our innovative quoting tool.
![Thumbnail [200x250]](/wp-content/uploads/Electric-Category-Page-Image.jpg)
![Thumbnail [200x250]](/wp-content/uploads/Hydronic-Category-Page-Image-1.jpg)
![Thumbnail [200x250]](/wp-content/uploads/6iE-Projects.jpg)